Bible Annotation: How to Annotate Your Bible (2026)
TL;DR
Learn how to annotate your Bible with highlights, notes, and symbols. Simple marking systems that help you remember and understand Scripture better.
Bible Annotation: A Beginner-Friendly Guide to Marking Up Scripture
Have you ever finished reading a chapter of the Bible and realized you can't remember what you just read? You're not alone — and that's exactly why Bible annotation can be such a game-changer for your Scripture reading.
When you mark up your Bible with highlights, notes, and symbols, something wonderful happens: you transform passive reading into active engagement. Your Bible becomes a personal journal of your faith journey, filled with insights, prayers, and moments of discovery.
The best part? There's no wrong way to do it. Let's explore how to annotate your Bible in a way that works for you.

What Is Bible Annotation?
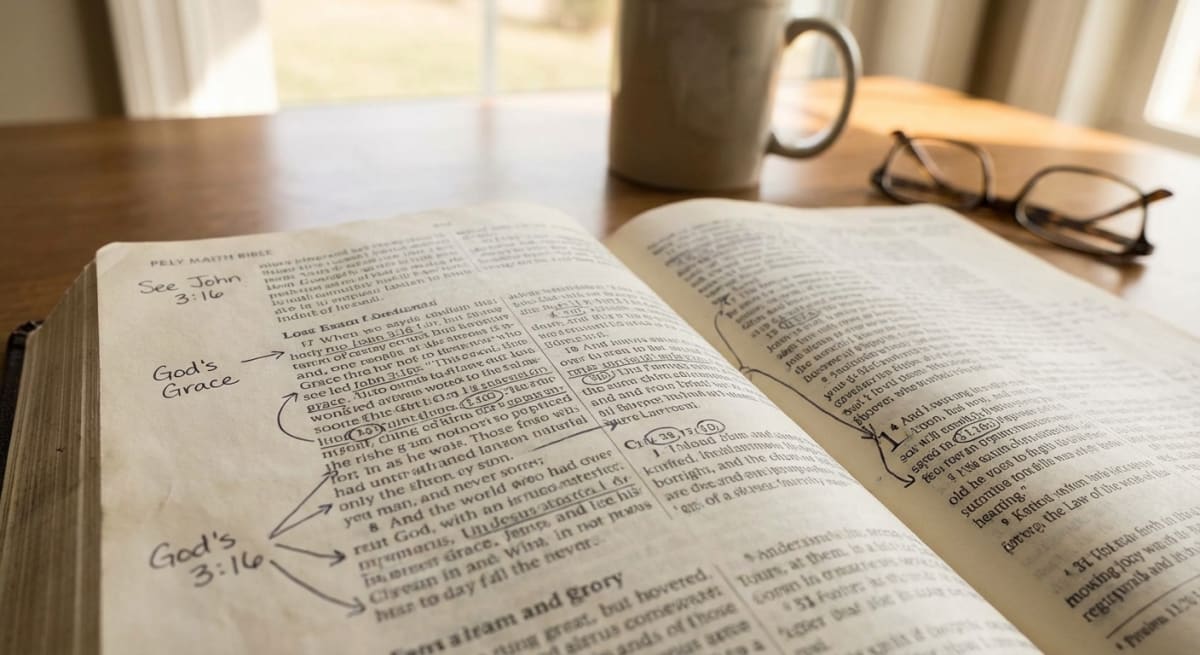
Bible annotation is simply the practice of marking up your Bible as you read. It can include:
- Highlighting key verses or phrases
- Underlining important words
- Writing margin notes with your thoughts
- Using symbols to mark themes or ideas
- Adding cross-references to related passages
Think of it as having a conversation with Scripture. Instead of just receiving the words, you're responding to them — asking questions, making connections, and recording the moments when something resonates with your heart.
Why Annotate Your Bible?
Before diving into how to annotate Bible passages, let's talk about why it's worth your time:
Better retention: Writing and marking engages more of your brain than just reading. You'll remember more of what you've studied.
Deeper understanding: When you pause to mark something, you're processing it more deeply. You're asking, "Why does this matter?"
Personal connection: Over time, your Bible becomes a record of your spiritual growth. Flipping through pages and seeing your notes from years ago can be incredibly meaningful.
Easier review: When you want to find that verse that spoke to you, your marks make it easy to locate.
If you're working through a Bible study plan, annotation makes each session more impactful and memorable. Tools like BibleMate make it easy to follow a structured reading plan alongside your annotation practice.
Getting Started: What You Need
The beauty of Bible annotation is that you can start simple. Here's what you'll need:
For Physical Bibles
- A wide-margin Bible (recommended but not required)
- Fine-tip pens (Micron pens are popular — they don't bleed through)
- Highlighters (dry highlighters work best for thin Bible pages)
- Colored pencils (for a softer look)
For Digital Annotation
- Bible app with annotation features (YouVersion, Logos, Olive Tree)
- Tablet with stylus (optional but helpful for handwriting)
Don't feel like you need all of these to start. A simple pen and your existing Bible is enough. You can always upgrade later!

Bible Color Coding Systems That Work
One of the most popular approaches to annotation is using a bible color coding system. Here are three simple systems to consider:
System 1: By Theme
| Color | Theme |
|---|---|
| Yellow | God's promises |
| Blue | Commands to follow |
| Green | Examples of faith |
| Pink | Prayers |
| Orange | Warnings |
| Purple | Prophecy |
System 2: By Application
| Color | Application |
|---|---|
| Yellow | Things to remember |
| Green | Things to do |
| Pink | Things to pray about |
| Blue | Things to study further |
System 3: Simple Two-Color
Sometimes less is more:
- Yellow: Verses that comfort or encourage me
- Pink: Verses that challenge or convict me
Pro tip: Write your color key on the inside cover of your Bible so you don't forget what each color means!
The best bible highlighting system is the one you'll actually use. Don't overcomplicate it — you can always add more colors later.
Symbols and Shorthand for Bible Marking
Using symbols is a quick way to mark up your Bible without writing full notes. Here's a bible marking system using simple symbols:
| Symbol | Meaning |
|---|---|
| ★ | Key verse |
| ? | Something to study later |
| → | Cross-reference |
| ! | Important insight |
| ❤️ | Personal favorite |
| ○ | Promise |
| □ | Command |
| △ | Attribute of God |
You can create your own symbols too! Some people use:
- A light bulb for "aha moments"
- An arrow pointing up for prayers
- A clock for "timing" or prophetic verses
Margin Notes: What to Write
Your Bible's margins (or the note feature in your Bible app) are perfect for capturing thoughts. Here's what to write:
Personal reflections: How does this verse apply to my life today?
Questions: What don't I understand? What do I want to explore?
Cross-references: Where else does the Bible talk about this topic?
Word definitions: Looked up a Hebrew or Greek word? Jot it down.
Sermon notes: Heard something insightful? Record it next to the passage.
Prayers: Turn Scripture into prayer right there in the margin.
Digital vs. Physical Annotation
Both approaches have their benefits. Here's an honest comparison:
Physical Bible Pros
- More memorable (handwriting aids retention)
- No battery required
- Becomes a meaningful keepsake
- Fewer distractions
Physical Bible Cons
- Can't search your notes
- Limited margin space
- Pen mistakes are permanent
Digital Bible Pros
- Searchable notes and highlights
- Unlimited space for notes
- Easy to share with others
- Multiple translations at your fingertips
Digital Bible Cons
- Screen fatigue
- Potential for distraction (notifications!)
- Notes tied to specific apps

Many people use both — digital for searchability and physical for deeper study sessions. Do what works for your life!
Bible Annotation Tips for Beginners
If you're new to annotating the Bible, here's how to get started without feeling overwhelmed:
- Start with one color or symbol — Don't try to implement a complex system right away. Just highlight things that stand out.
- It's okay to mark up your Bible — Really. Your Bible is meant to be used. A well-worn, marked-up Bible is beautiful.
- Don't overthink it — If something strikes you, mark it. You don't need to analyze why.
- Date your notes — This helps you see your growth over time.
- Leave room — Especially in your first read-through. You'll have more insights later.
- Use pencil first if nervous — Some people start with pencil until they're confident, then go over with pen.
- Start with a reading plan — Having structure helps. Check out our guide to starting daily Bible reading for ideas.
How Bible Annotation Improves Your Study
When you commit to a bible annotation guide approach, something shifts in your reading:
Pattern recognition: When you mark similar themes across books, you start seeing connections you missed before. God's faithfulness in Genesis connects to His faithfulness in Psalms connects to His faithfulness in your life.
Active processing: The physical act of marking makes you slow down. In a world of skimming, this kind of deliberate reading is powerful.
Memory building: Studies show we remember what we write. Your annotations become memory anchors.
Personal theology: Over time, you're building your own theological reference — not someone else's commentary, but your own insights and questions.
If you want to take your study deeper, consider combining annotation with a structured approach. Not sure where to begin? Our guide on how to read the Bible can help you build a foundation.
Creating Your Annotation Habit
The best annotation system is worthless if you don't use it. Here's how to make it stick:
- Keep supplies with your Bible — Friction kills habits. Have everything in one place.
- Set a daily time — Even 10 minutes of annotated reading beats 30 minutes of distracted skimming.
- Join a reading plan — Structure helps. Our free reading plan pairs perfectly with annotation.
- Review your annotations — Spend a few minutes each week flipping through recent notes.
Learning how to read the Bible daily becomes so much richer when you're actively engaging with the text.
Frequently Asked Questions
Is it okay to write in my Bible?
Absolutely! Your Bible is a tool for growing closer to God, not a museum piece. Marking it up shows you're engaging with it. Many people treasure their annotated Bibles as records of their faith journey.
What are the best pens for Bible annotation?
Fine-tip pens like Pigma Micron (sizes 01-05) are popular because they don't bleed through thin Bible pages. For highlighting, try dry highlighters or colored pencils instead of regular highlighters.
Should I annotate during my first read of a book?
You can! But some people prefer to read through once without marking, then annotate on a second pass. There's no right answer — do what helps you engage.
What if I make a mistake?
Mistakes happen. If you're nervous about permanent ink, start with pencil. But honestly, "mistakes" often become part of your Bible's story. That crossed-out note shows you've grown in understanding.
What's the best Bible for annotation?
Wide-margin or journaling Bibles give you more space to write. Look for editions with thicker paper (50+ GSM) to prevent bleed-through. ESV, NIV, and NKJV all offer excellent journaling editions.
Can I annotate a digital Bible?
Yes! Apps like YouVersion, Logos, and Olive Tree all offer robust highlighting and note-taking features. Digital annotation is searchable and portable, though some people find physical annotation more memorable.
Bible annotation isn't about creating a perfect system or having the prettiest Bible. It's about making Scripture personal — about leaving your fingerprints on the pages as you walk with God through His Word.
Start simple. Mark what moves you. Write what you're thinking. Ask your questions. Over time, your Bible will become a beautiful record of your faith journey.
Ready to put your new annotation skills to work? Start your free Bible reading plan on BibleMate and begin marking up Scripture today — one day at a time.
Related on BibleMate
Keep exploring related topics, plans, and lists.
Bible Verses About Love
Discover powerful Bible verses about love — God's love for us, loving others, and the greatest commandment.
All 66 Books of the Bible
Complete list of every book in the Bible in order — Old and New Testament with author, chapters, and genre.
Chronological Bible Reading Plan
Read the Bible in the order events actually happened — perfect for understanding the full narrative arc.
How to Read the Bible Daily: 15 Tips
Practical tips for building a daily Bible reading habit that actually sticks.
Get the BibleMate App
Take your Bible reading anywhere. Track progress, build streaks, and stay on plan — all from your phone.
Ready to start your Bible reading journey?
Read the entire Bible in one year with daily guidance.